|
|
W1FTE - Installation of ATAS-120 Mobile Antenna with Mag Mounts |
THE PLAN
I had purchased a Yaesu FT-875D radio
and ATAS-120A antenna in 2007. The ATAS-120 is an antenna
designed to be used with the FT-857. It can be tuned to any
frequency in the 40 through 6 meter bands from the car by simply tuning
the rig to the desired frequency and pressing a tune button on the 857.
I wanted to install them in our cars but did not want to mount the
antenna on the bumper or trunk lid. So, I dusted off a Tri magnetic
mount that I had been using
with an old Hustler antenna. But a
trip to Florida was being planned and I wanted a mount with more holding
strength than the old Tri-Mag mount would provide for the higher highway
speeds.
We have two cars and I wanted to be able to mount the antenna on each of
them.
THE OWNERS MANUAL SAYS
The owners manual said “magnet mounts do not
provide the RF grounding necessary for good performance, and are
not recommended for use with this antenna.”
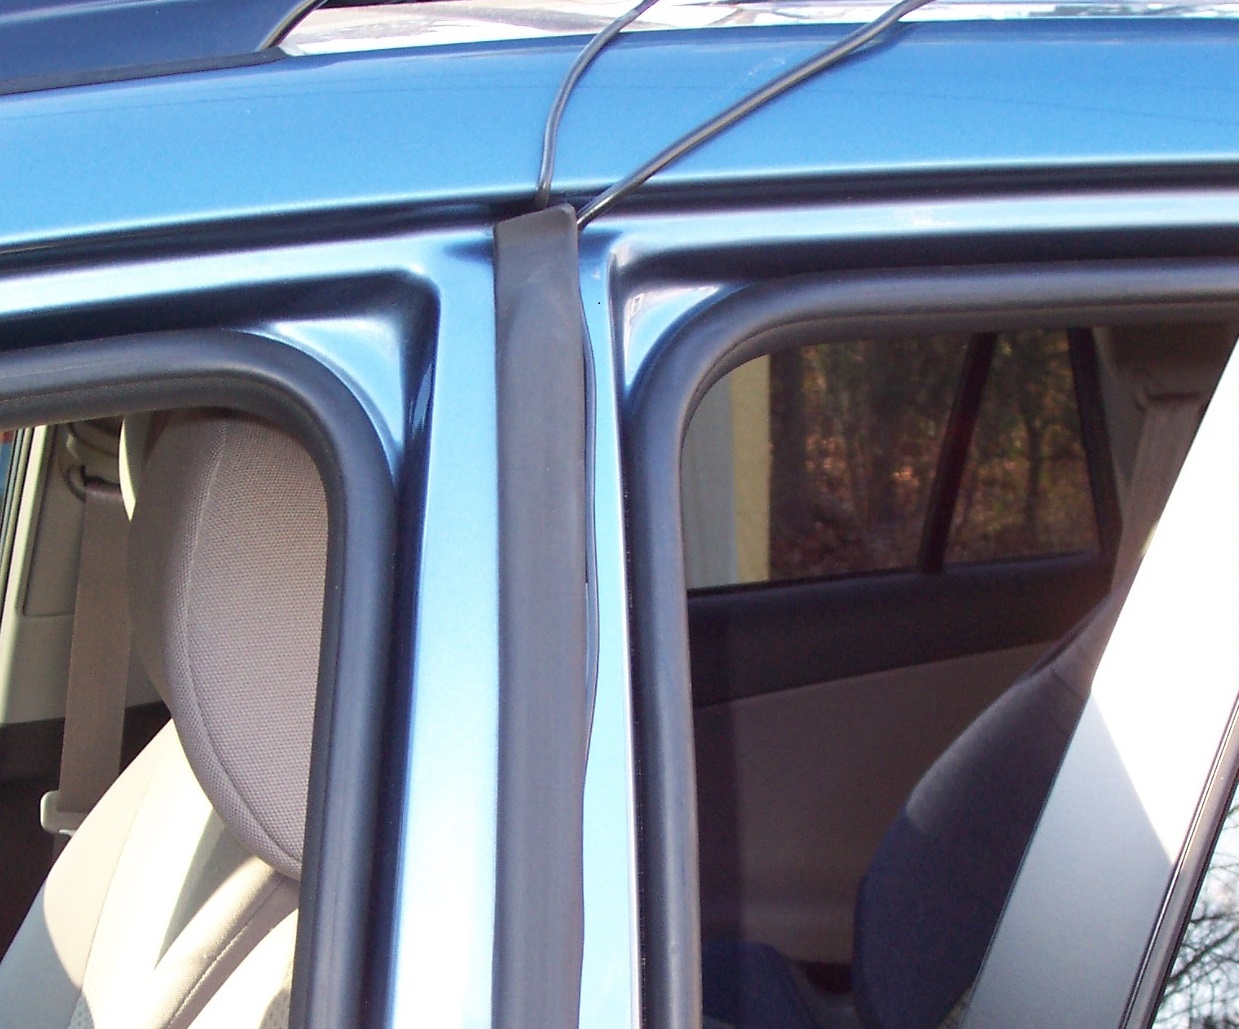
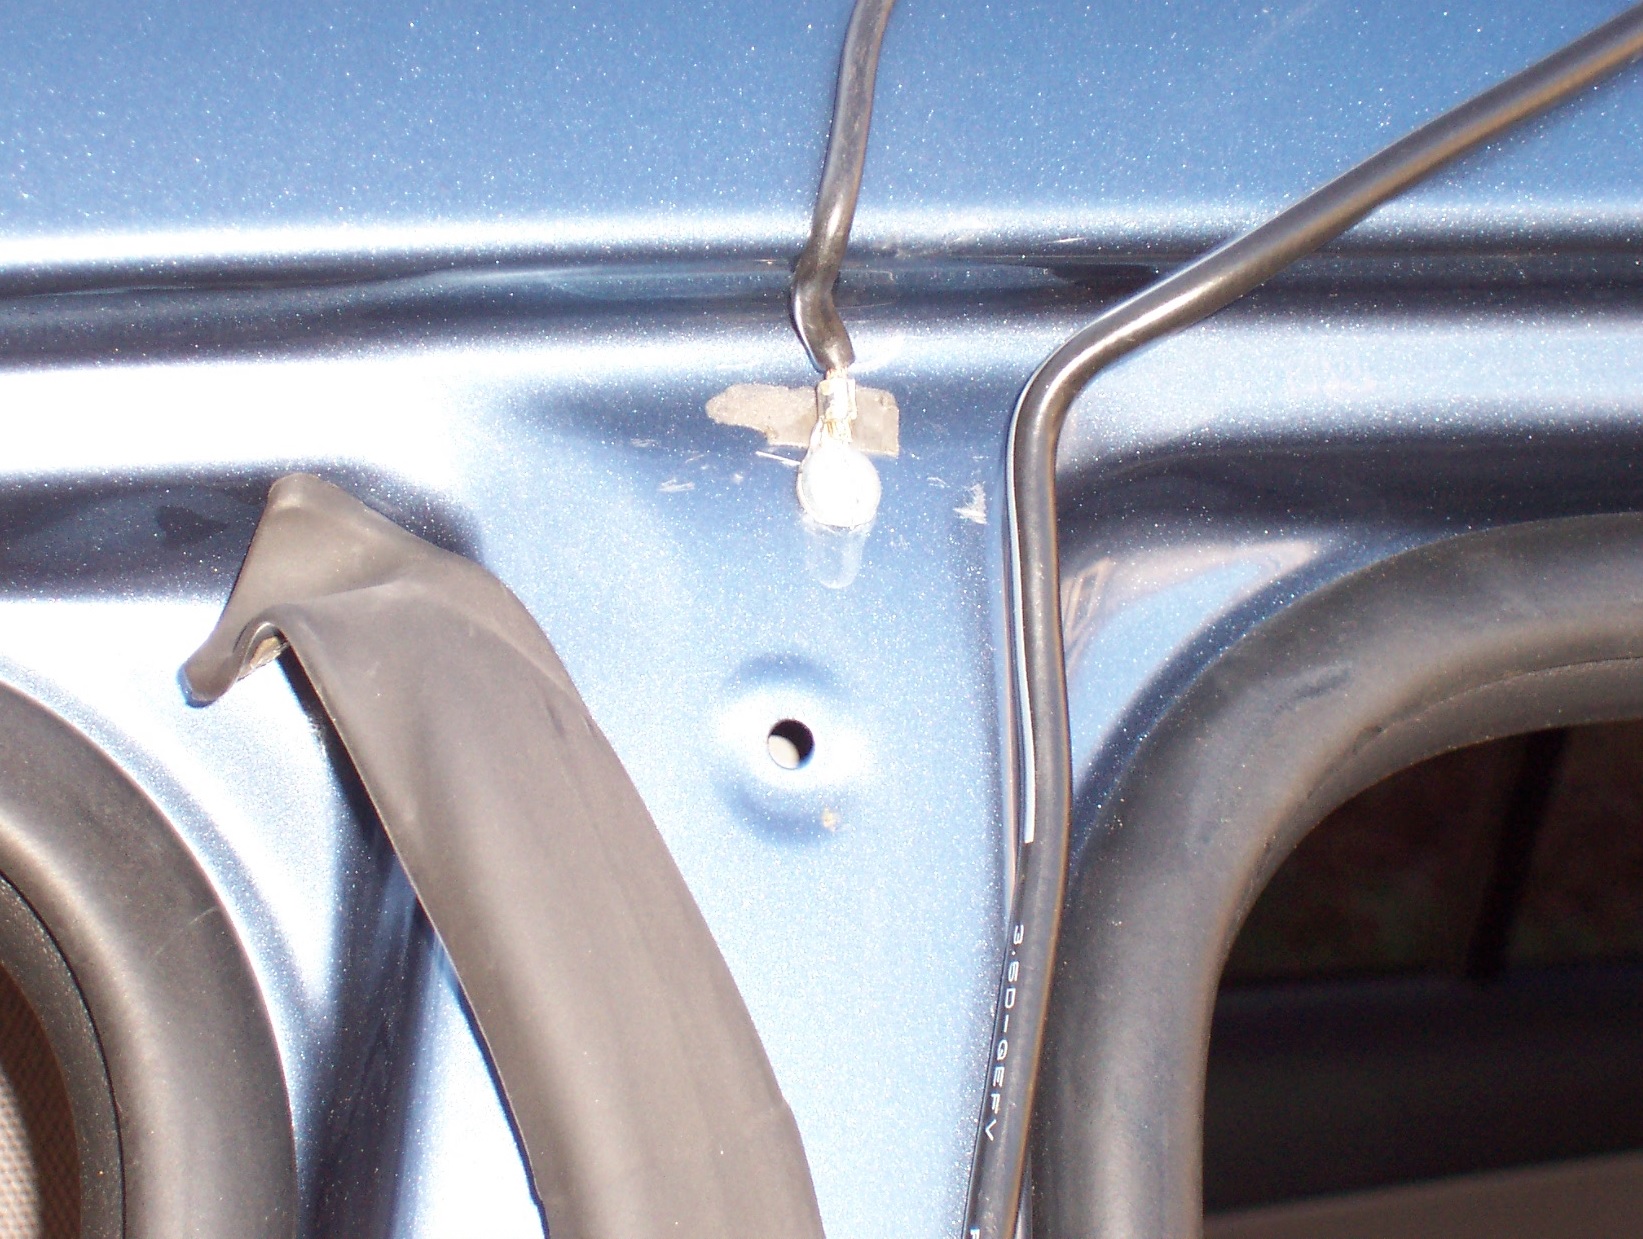
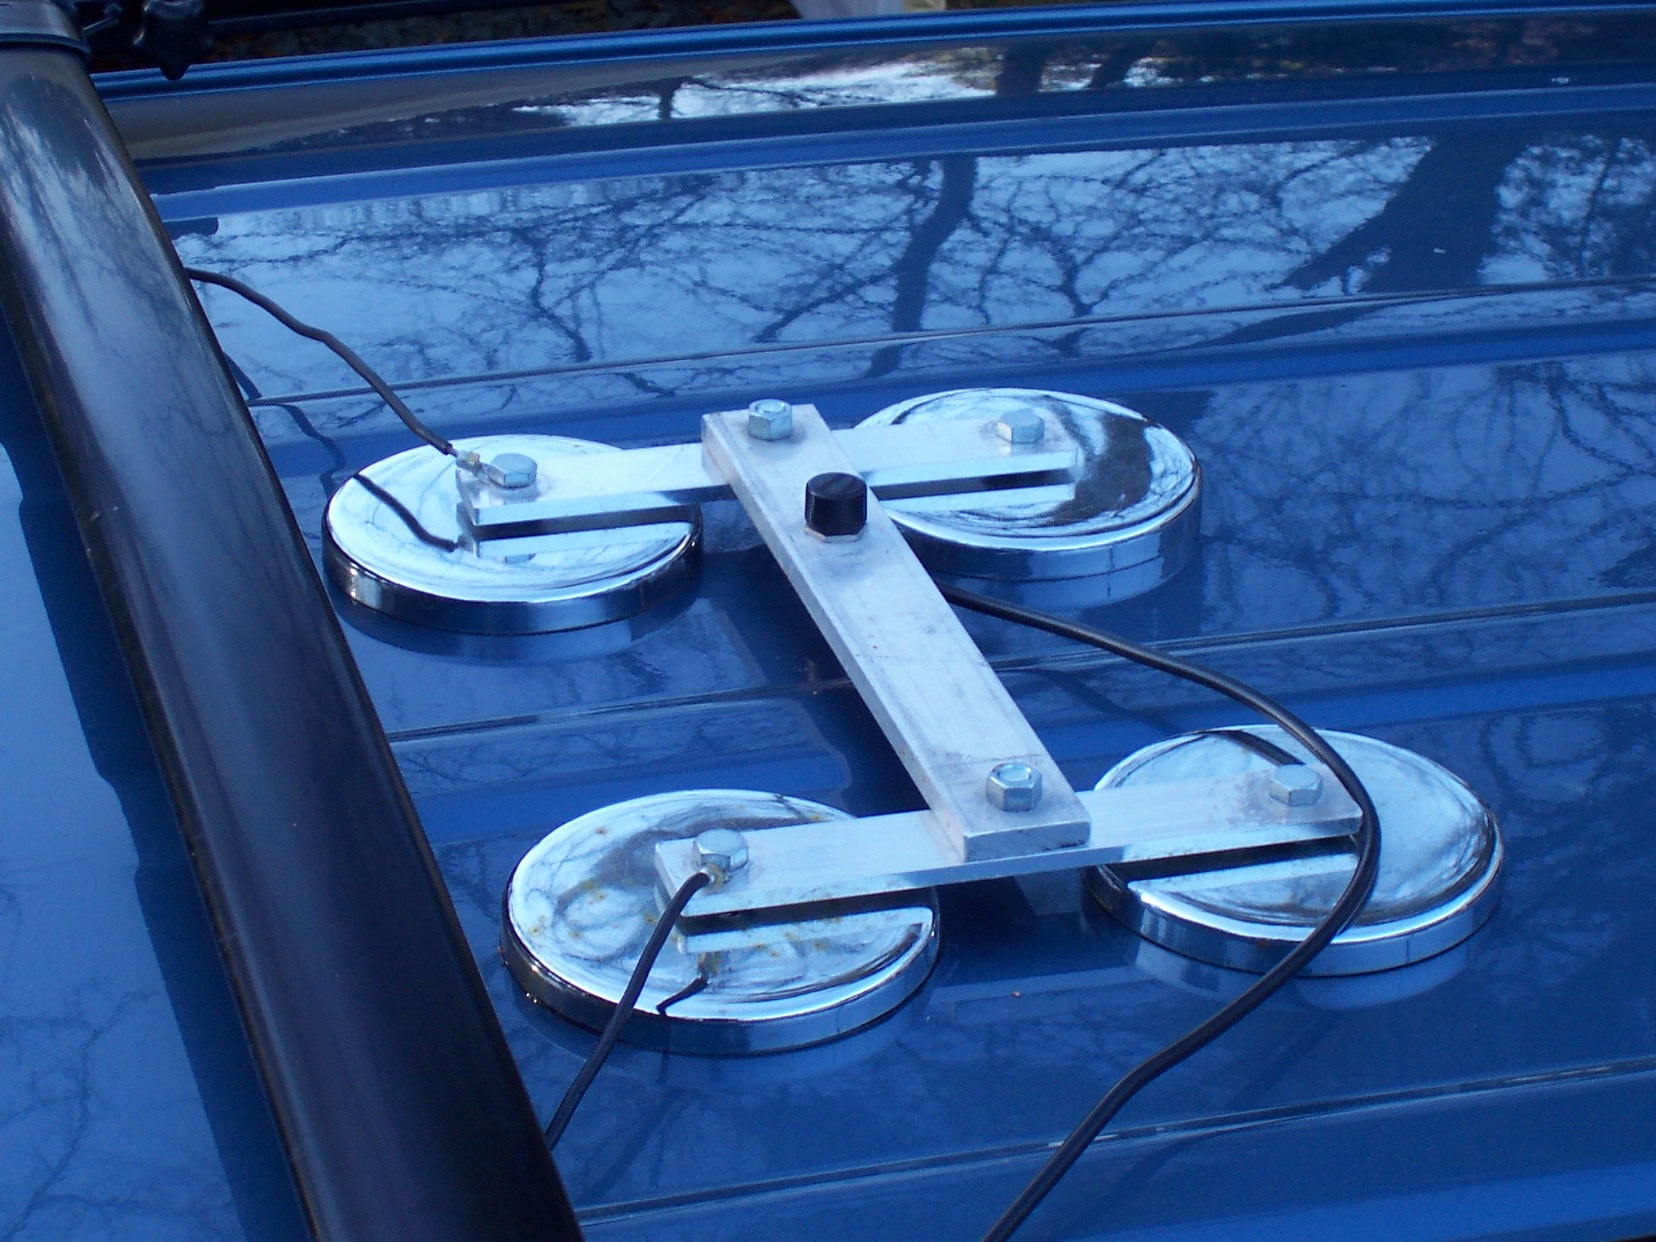
To overcome this defect, I ran a ground wire from each magnet
connecting bar to each side of the body of the car at the roof line.
The vertical rubber gasket between the doors was able to be
pushed aside just enough to drill a hole for a sheet metal screw,
which was then invisible when the gasket was relaxed to its normal
shape. I scraped the paint
around the hole to insure a good contact.
Because this involved drilling a hole for the ground screw, I had to get
my XYL's permission before drilling on her car. Her initial
reaction was “drilling holes in my new car, no way”
When I showed her where the holes would be, and that they would
not be visible, she said “OK”.
When the vehicles are sold the screws will not be visible.
I anticipated a potential problem with the strong magnets and my watch
so I took my wrist watch off when working with the
mounts.However, I made the mistake of placing the magnet mount on an old
metal projector table and had to take the cross bars off in order to get
the magnets off the table individually.
OK, so I am almost age 70 and not Charles Atlas.
Each magnet has 200lbs of attractive force.
With four magnets, that’s 800lbs of holding power.
CAUTION:
Do not get your fingers in the way!
The bottom of the ATAS has two slots for an open end wrench but
they are too narrow for a standard wrench.
I had the machine shop make one as I wanted to be able to tighten
the antenna beyond just using my hands.
When the antenna is not on the magnetic mount be sure to put the
weather cap on the SO-239 to keep the water out.
ML says you are going to lose it so get some spares at the
hardware store.
For the rig, I pulled the carpet aside under the dash board and
found a bolt that I could back out and I used it for a ground
attachment to the rig.
I used the threaded holes in the rig that the mounting bracket
would be used for. If you
attach the mounting bracket, MMB-82 to the dash board be sure to run a
ground as many dash boards are mostly PLASTIC!!
NOT ALL ROOFS ARE CREATED EQUAL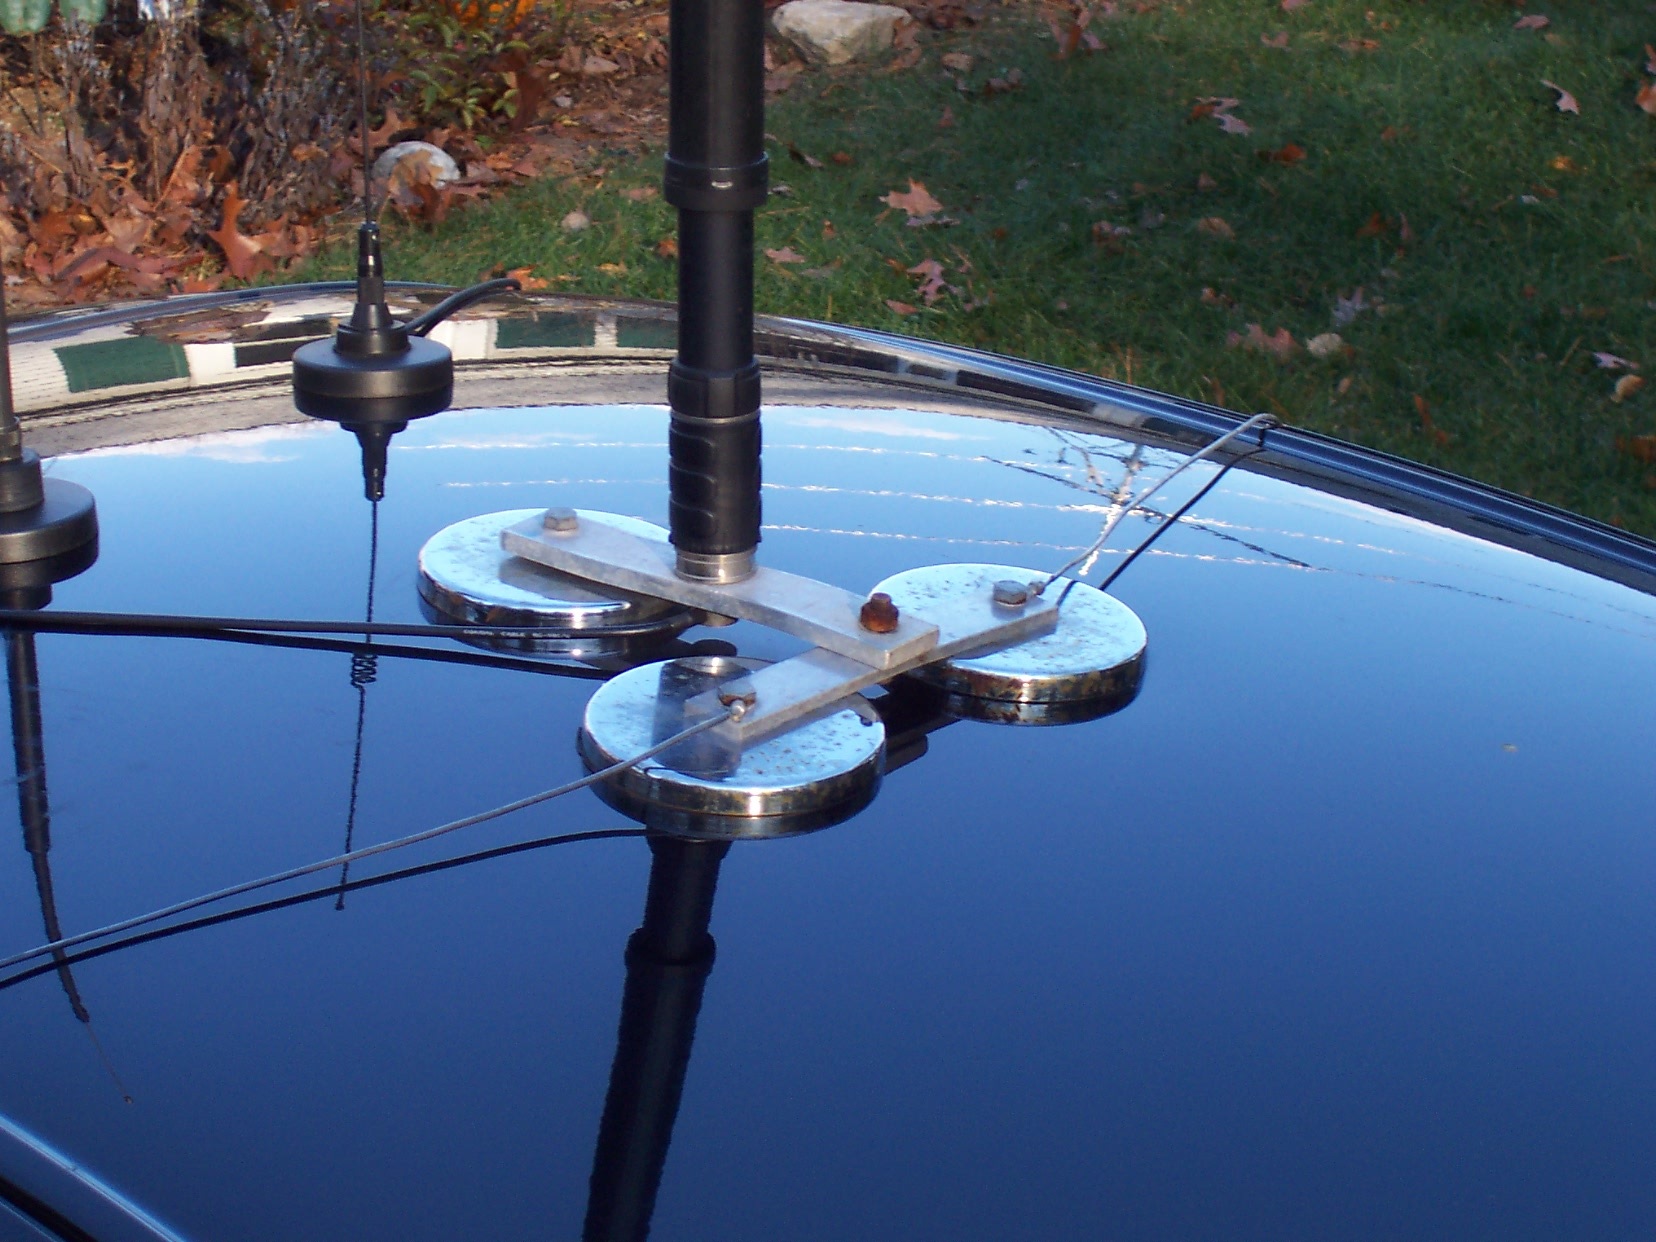
To ensure proper fit-up for the XTL's car, I placed a large piece
of paper on the floor and traced around each magnet then placed the
paper on the roof to get the position between the ridges.
I then separate the magnets, two and two,
with the connecting cross bar attached to one side only, using
that for a handle. Astep
ladder was necessary to get into the best position and have enough
height for the installation. I suggest
that you have someone to help.
I put the SO-239 in the cross bar 5/8² hole while the magnet pair was separated. This
is necessary becuse there is NOT enough room to slide it in from under
the connecting bar once the magnets are in place!
I placed one set of magnets EDGE down and then lowered the
pair to the vehicle roof.
The fun part was getting the other pair of magnets down without my
fingers being shortened.
I had reversed the bolts so that the heads were down, closest to
the roof, and the nuts were attached from above.
That way the socket wrench would work the nuts from above and an
open end wrench would hold the bolt in place from underneath, next to
the roof. After getting the
2nd set of magnets in the proper position, the cross bar from the first
pair of magnets was reattached to the 2nd set of magnets.
I use the Tri Magnet mount for my car with the smooth but curved roof.
Because each magnet has to sit flatly on the roof, it was necessary to
bend the cross bar between the magnets to accomodate the roof's
curvature. The machine shop
bent the cross bar for me.
When we stayed at a motel the ATAS was removed from the magnet mount and
the rig from the dash board and taken inside for the night.
W1FTE got his license 5-24-1955, has
an Extra license and is active on all bands
Can be reached at w1fte@arrl.net